|
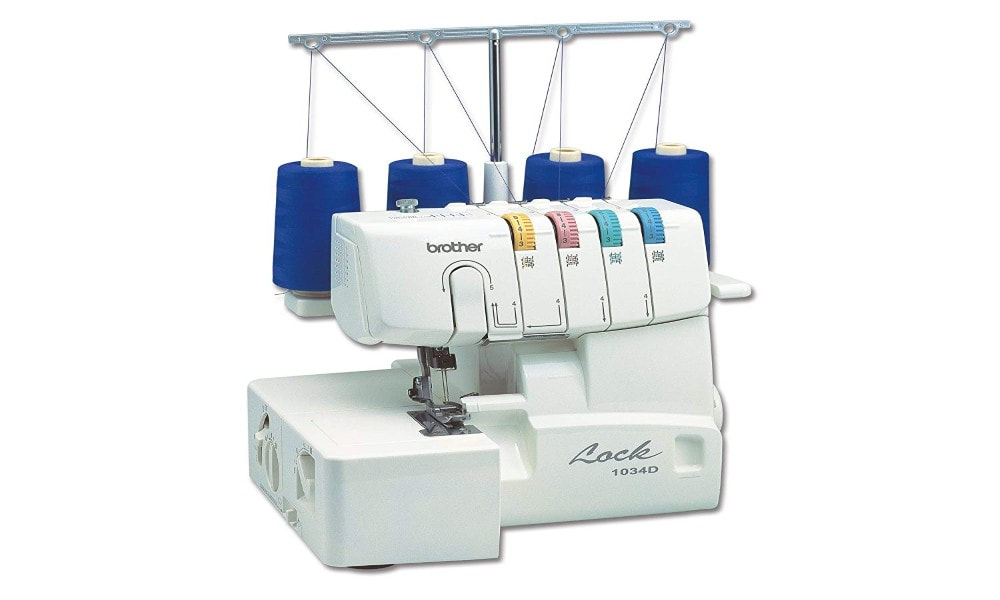
using a serger machine doesn't have to be a frustrating experience I'm going to share some quick tips to make your life a little bit easier welcome to the Sewing Report I'm Jennifer Moore helping you discover your love of sewing and we're here with the brother 1034d serger I love this thing I use it several times a week it is a great value and I'm going to share with you a few tips that I have learned from from real practical experience that will hopefully help you not make the same mistakes I have so let's get started this is not going to be a full-out tutorial but what I am going to do is show you a few little things that I've picked up just from working with this machine that have made my life a little less frustrating so the first thing that I would recommend is to always make sure you test out the exact scrap of fabric that you're going to be using for your project before actually starting to serge your real the real deal because what happens is different fabrics will behave differently with the serger so you want to make sure that you are using the exact same fabric so that you can make sure all of your settings are correct so I've got some double knits here I've got this bed sheet that I used this is an all 100-percent cotton bed sheet and some canvas all of these fabrics will require slightly different settings on the serger so I'm actually going to show you what I'm talking about here so I've got this scrap of knit fabric and there are a few things you can change about your surgery which is the differential feed and that means that it will either stretch out your fabric a little bit or it will kind of push it together as it's feeding through the serger you can also change your stitch length so you can have the stitches be farther apart or closer together and you can change the stitch width so that will be how wide your over locking stitches now in full disclosure this machine can do a lot of different things but I really only use it for that one for thread overlock function because that's what I bought it for you can do a lot more with it but we're not going to get into all that today there is a craftsy class so that I do recommend it's about using your serger and I'll link it in the description can box that you can you can check out i have bought it but i haven't really gone through all of it yet but it goes through all the different functions that the serger has and different things you can do with it but I just personally find it it's kind of a pain in the butt to convert things or change the settings so I'm pretty much.
|

|
|
I like to keep it as is because I really just bought it for that one function which is to finish your seams so I'm going to go ahead and put this double knit in here so make sure when you're using your serger machine you want the you want the knife to be in one of the higher positions to start and always make sure to lift your presser foot up before you put your fabric in it so we're just going to make sure this has and and i've noticed what the double knits you do i actually have this on the wrong setting just for demonstrative purposes if you put this on the lowest setting it's going to really stretch out your knit fabric and give it that wavy lettuce edge which you do not want yeah see this is this is not going so well so this is why you want to test things out so I actually want this at the highest setting of gathering and this will actually push your fabric through see how much easier that was the reason you're doing that is that this is kind of spongy fabric and you'll see that my fabric here doesn't have that that wave or curl to it so that is why you want such a differential feed higher for real spongy fabrics you want to have it lower for anything delicate like chiffon or even like Jersey knits you don't want to have it on the lowest setting but you want it you don't want to have it on this gathered setting I'll show you what happens when you put a cotton fabric in on a gathered setting it's not going to be pretty also always keep a pair of scissors with you you're going to you're definitely going to need them all right so I want to put this cotton fabric in here just for demonstrative purposes to show you what it will be like we're going to feed this cotton fabric in here now we've got the differential feed on to which is going to gather the fabric actually that did not gather as much as I thought but maybe that's because it's a very stable fabric but you really don't want it on gathered for cotton you or Wat this on like maybe 1.
5 something like that this is typically a better setting for cotton or woven fabrics another thing I've learned the hard way is when you are working with stretchy fabrics say you're putting a neck band into a neckline and you always have the neck neck band be a little bit shorter and you will end up stretching it as you are serging it you want to make sure that your stitch length is a little bit higher because what happens is if you're stretching out the fabric and you already have it on a very narrow stitch length when you snap it back into place it's going to be really concentrated so what you want to do is if you are stretching it out you want to make sure your stitch length is not on the lowest study and you want to make sure it's maybe even at the highest setting because it's going to be a little more concentrated after you're done so I will show you how this will work so I'm going to start sewing this knit fabric and we're just going to cut this little piece off here I love having sinners by the by the serger it just makes your life a lot easier and I'll show you what happens both ways when you have it on a narrower stitch length and on a wider stitch length so this this is actually on a pretty wide stitch length so you see I'm stretching out the fabric as I so so when it snaps back into place it's actually more of the stitch length you want now if I put this on a narrower stitch length and stretch this out it's going to be very very close together in fact too much so let's try that alright so you see how this looks this is way way too concentrated and in fact if you do this on a cotton fabric or if you're not using a ball point needle you can actually tear your fabric so that's not what you want this is way too close together that is why you want to have your stitch length be on the higher side I've actually done that with a few different neck bands and it was not pretty so I do not recommend doing that at all so this is what you actually want so this is a good stitching just make sure to keep that in mind if you are using a knit fabric that you're going to be stretching as you're searching we're going to test out this canvas here and again this is another reason why you should always test out your scrap fabric so let's try it out on a few different settings I'm going to move my stitch length down to three but I'll show you what happens if it's either on the lowest differential feed setting and on the highest differential feed setting all right this is on the lowest setting now this is actually kind of stretching out the fabric a little bit as it's feeding and i'm going to change it up to the highest setting now and we're going to see how that performs actually this fabric does seem pretty stable and both ways it seems to be performing pretty well but you don't know that so that's why you always want to test out your fabric on different settings to see how it looks now here's one mistake that I've made more than once and it's a little bit embarrassing is that I have put my presser foot up and forgot to put it back down so I'm going to show you what it will look like if you don't put your presser foot down this is what happens so sometimes you know you maybe you may start searching something and then for some reason you have to like put your presser foot up to readjust something and you forget to put it back down this has happened to be then you'll get this super ugly finished edge and that is not a good thing so always in your mind and make sure that you are remembering to always put your foot down otherwise you're going to get a little bit of a mess the birth or surgery really hasn't required a whole lot of maintenance but one thing I do regularly is make sure to clean out the insides after every couple of projects so I'm going to take the front off and show you look at how filthy this is I use q-tips and then I also use these Clorox triple-action dust wipes to really help me these things totally work by the way I'm going to link them below in the description box if you're interested in picking these up these are amazing and I use them for a lot more than just cleaning the serger and basically i'll just use the q-tips to kind of knock some of this fuzz off and then you can actually use the dust wipes to really grab onto some of this stuff and it really will do it it's not recommended that you use like an air blower just because you don't want these things to get further into the machine basically I just use this and you can even put this on the head of a q-tip and just use this and this won't push it around as much this will actually grab on to all the dust and crap that's in the machine it can also use this for the top you can use this for anything but notice when you're cleaning it out you'll get a bunch of junk down below so I just keep a trash can near whatever I'm doing and then just keep sweeping this into the trash can so that is how I clean up my serger changing out the threads the thing that everybody struggles with I personally find that just starting from scratch is the best way i've seen some tutorials where you like not your old thread into the your new thread but you don't want to damage your tension discs so I find the easiest thing to do is just start all over again so to change out the thread you just cut your threads run your tail and now you've got a clean clean path to work with so just take your old threads out and I'm switching from dark gray to pink because my next project is going to have pink and blue fabric so I thought this would match a lot more than the dark gray all right let's get our new spreads in here and you're just going to run each of these through here and I've gone to the point where I can really rethread the serger in under five minutes unless I run into some problems what's occasionally you do but hopefully this time it will go okay and I've got these spool caps on the spool pins and those are for anytime you're using a serger cone awesome going to be using of course the tweezers that came with the machine to make my life a little easier when you're getting to the hard-to-reach places there we go all right so how I do it is that I will one by one just put these through the metal holders here and then of course you've got to start with these are all color-coded you have to start with number three first the third one so I'm just going to put these and I'll put these all through the tension disks just to get them started okay there's also the tension discs so now you have to go through and I gotta start with a green one and literally this machine is color-coded so once you get the hang of it it actually really isn't that bad so I'm just going to guide these through and then this one goes so this is one of your looper thread and I just need to make sure to get this in here and if you're having trouble make sure to just snip a little bit of the salt to give you a cleaner and to your thread and you just really need to put that through there and then use your tweezers to grab the other end so this is the first thread and of course you're actually going to want to have this go under the presser foot this is why these tweezers are amazing alright so now we're ready for the fourth thread and this is blue so you just need to make sure to run these through these two metal guides through this little into this little hook here and then you're actually going to pull the section out here place your thread in here put it back in and then you're going to run it through this tiny little high right here but then you want to make sure and it even has it in the picture you want to make sure that when you're running this through that it goes under this upper looper hook last there we go I got this in alright so we've got the hardest to done and that is three and four threads so now it's the easy breezy part which is doing the needle threading yeah I don't know why this is like the order it is that you're supposed to do three four two and one that's the order you thread it in so this one's actually pretty easy all you have to do is guide this through here and this is more like threading a traditional sewing machine and then you just have to do and you do the right and then left so again I always like to for whatever reason spit on it which is probably not the most sanitary thing but you know it works and then trying to get your tired eyes to see through the needle alright this one went okay there we go and you always want to make sure it's you want all your threads to be under the presser foot so and we're going to test this out to see how I did with the threading also one note is that a thread cone number three is going to use by far the most thread because this is the looper so one thing I've been doing is that when you're switching out the serger cone threads kind of switch it up a little bit otherwise this one's going to run out of thread way before the others so if you're kind of mixing them up you know maybe put number 32 number one and then kind of move them around sort of like flipping your mattress just so that you don't get a lot of wear on just one just one side all right so we're down to the homestretch folks and I don't think I actually don't think I need to cut it it seems pretty clean yeah the I this is obviously obviously you can use a needle threader if you have one I'm just I don't know apparently I just like to torture myself so I'm just doing it this way why all right I think that worked so it's make things a little less like you want to throw the serger out the window use the tweezers honestly out of everything that came with the serger the tweezers are by far the most valuable thing besides the third serger itself alright so now you're ready to test it out and then start cleaning off all right hopefully hopefully we're good all right put your little catch basket back let's try this again and hopefully this works out better than the last time alright remember we keep your presser foot down and I want to go slow just okay all right and we're in business so that is how you change your serger thread's obviously sometimes it's not always a walk in the park but it's a necessary evil of using a searcher I have not thrown it out the window so win for me and hopefully you found these tips helpful again I'm Jennifer Moore with the Sewing Report if you like these sorts of videos feel free to subscribe to this channel and make sure to smash the like button so you can show me some love I will see you next time for another video I like to do fabric hauls some technique type videos and sometimes just showing off stuff I make so I will see you next time.
